
Sourdough Croissants With Pasta Madre
Hand-laminated sourdough croissants made with pasta madre, step by step. My first batch after a year's pause, the mistakes beginners make, and how to fix them.
Table of contents
Hand-laminated sourdough croissants, the first batch after a year’s pause.
This post will be really helpful for beginners, because you may face the very same result at first. Just gain this experience and learn from my mistakes.
I gathered my understanding and struggles to make hand-laminated croissants with new ingredients and conditions.
This pastry has a list of critical elements for its success. They are:
- butter (unsalted, fat more than 82%, high plasticity, )
- flour with high protein (13-14%) and gluten strength
- temperature (17-22C while lamination and 26-28C while proofing)
- active, healthy sourdough starter or good-quality yeast
You’ll have an unexpected result if one point from the list is absent.
So, when I decided to return to making croissants, I started with flour and butter.
Ingridients:
1. Flour
I prefer to use Mulino Caputo. I couldn’t find it in Portugal, so I ordered it straight from Italy (ordered from https://vicofoodbox.com/).
For the pastry, I use Manitoba Oro, protein 14%.
2. Butter
I was looking for the President unsalted butter, which I used at home. I didn’t find it in any supermarket. But I don’t want to order it because of the warm weather. So I was looking for an alternative. I found Kerrygold Irish butter, with 82% of fat, high plasticity and rheology. It’s a perfect match ❤️
3. Sourdough
I decided to check my brand-new pasta madre.
Story:
And this is the real beginning of the story 😀
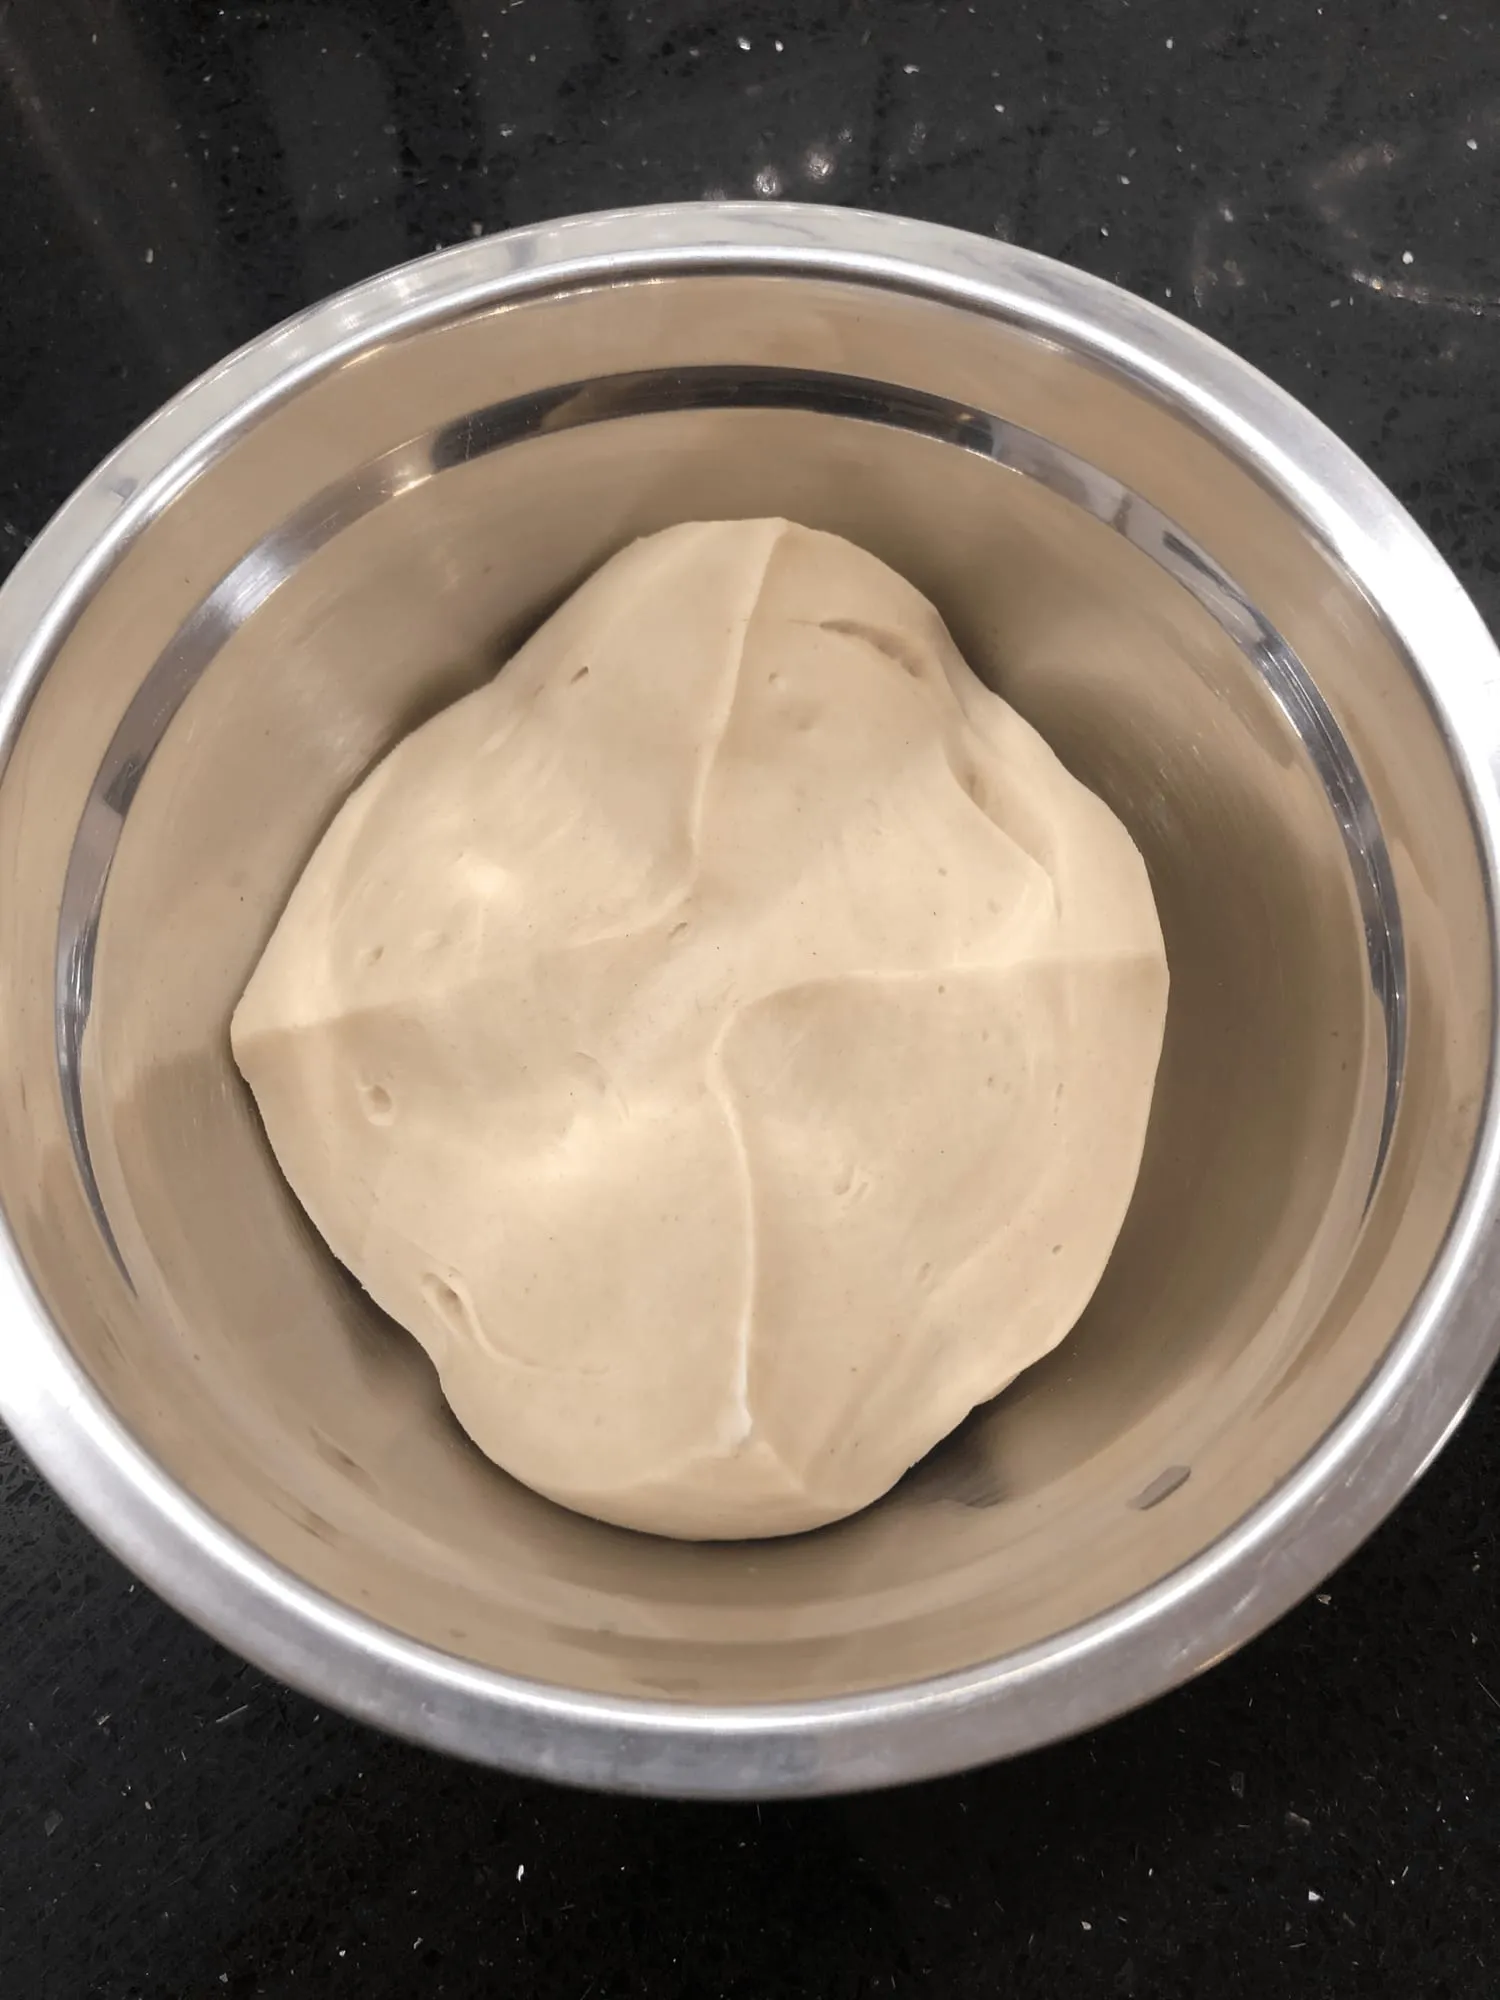
After I refreshed the Pasta Madre and it was time to make a dough (4 hours after the refreshment, t 26C), the leaven actually wasn’t ready for such activity. It was unripe. I knew it but decided to try.
This is the picture of an unripe pasta madre.
 Unripe Pasta Madre
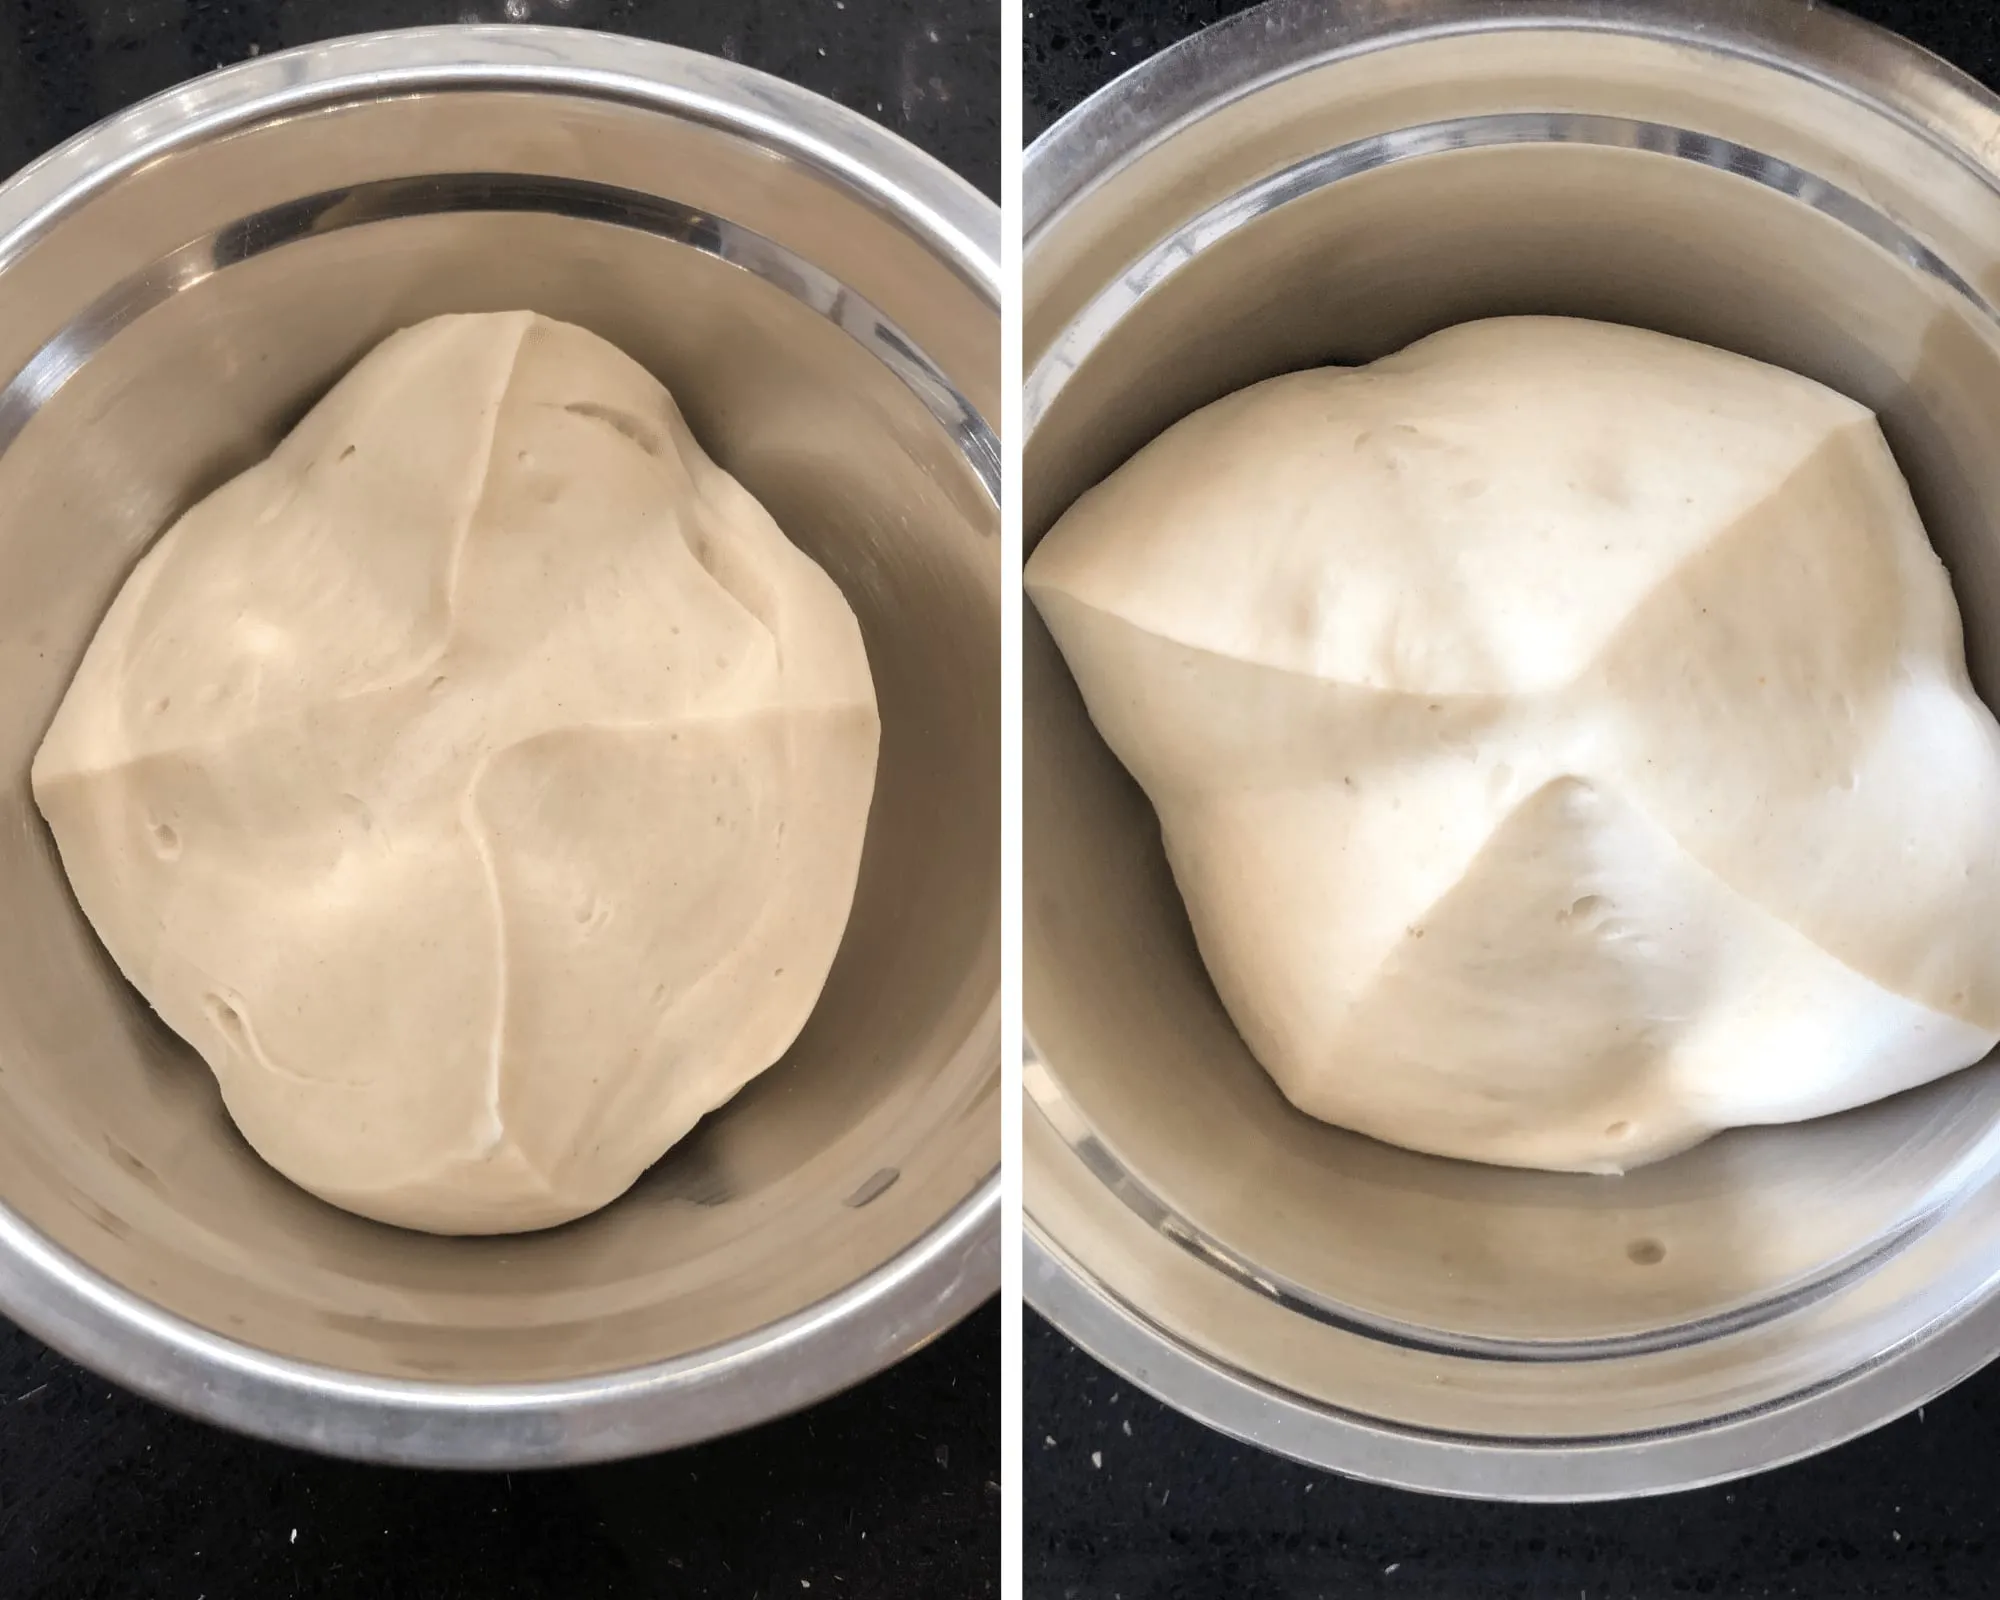
Here you can see some clear differences between unripe and ripe starters.
 Unripe and Ripe Starters Comparison
The Unripe starter:
✖️ has strict edges
✖️ looks dense
✖️ feels like a Play Doh 😀
The Ripe starter
✔️ has soft edges
✔️ looks cloudy
✔️ feel bubbles when you touch the surface (the poke test)
I was ready to jump into the adventure of making SD croissants with the unripe starter, because I was going to add fresh yeast. But I forgot to add them 🤦🏻♀️
The dough handling and the butter lamination process.
The dough was easy to handle, even though I kneaded it by hand.
I did the butter lamination at a room temperature of 20C.
Note: After each set of lamination, rest the dough in a fridge for at least 15 minutes. It helps to relax the gluten and cool down the butter. So the following set of lamination will perform easier.
I rolled the croissants and put them in an oven with the light on (to reach the temperature of 26-28C) overnight.
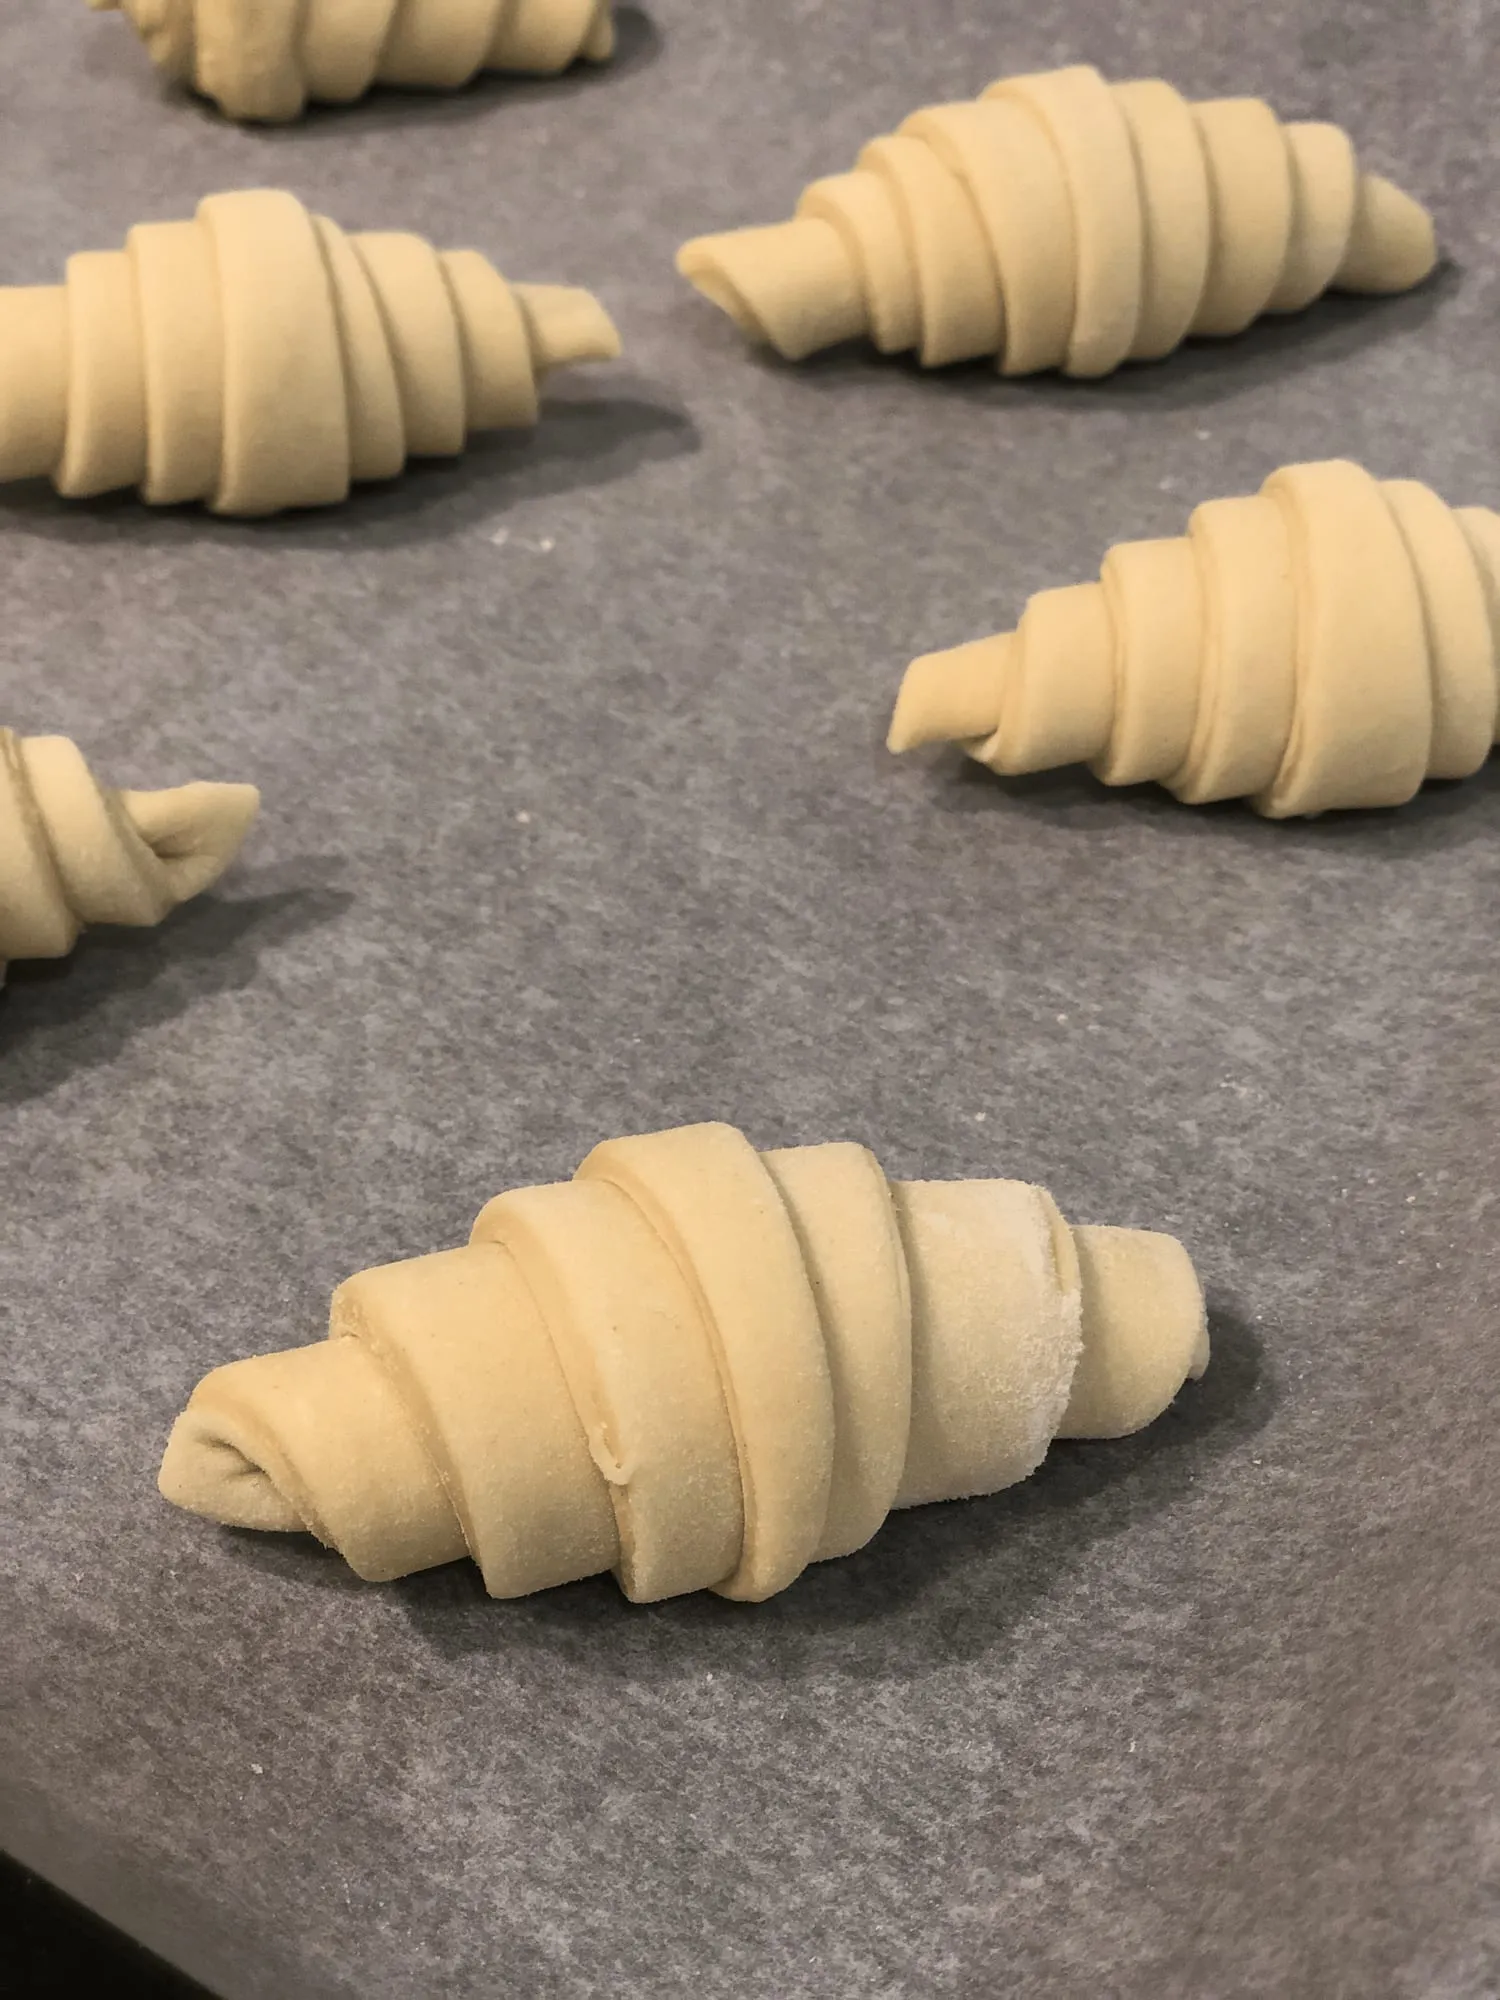 Just rolled Sourdough Croissants
12 hours later, I can hardly see any difference in their size. They were underproofed. This was a moment where I failed my morning coffee with a croissant.
But I still expect to drink my midday coffee with a croissant.
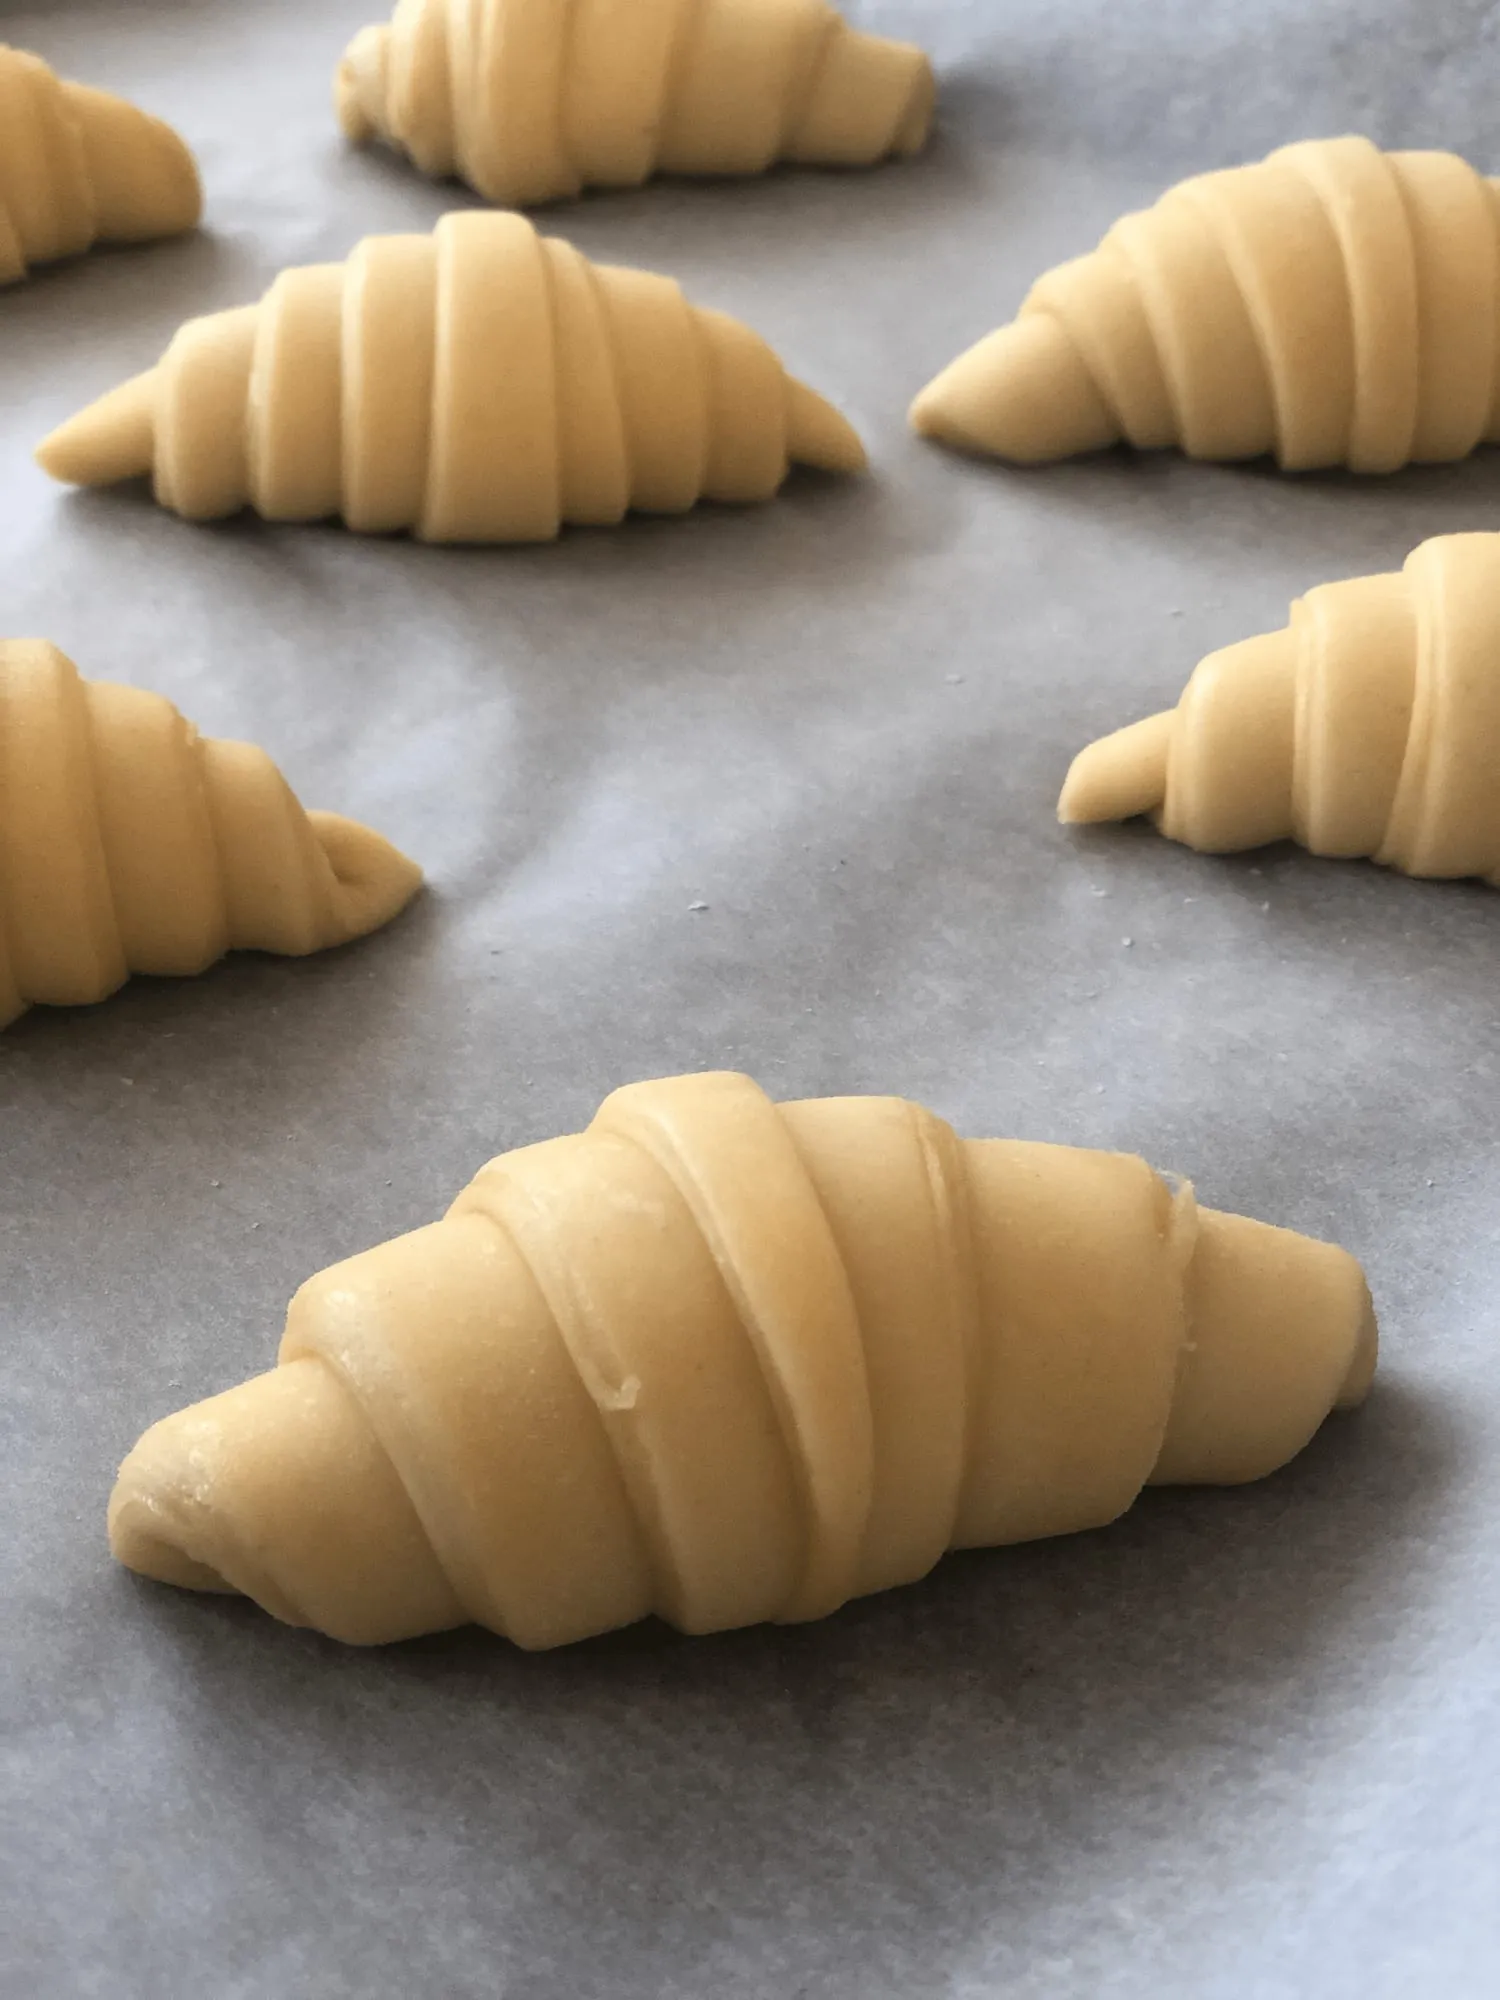 Sourdough Croissants after 12 hours of proofing
That’s why I let the croissants proof for additional 4 hours and baked them after 16.5 hours of proofing.
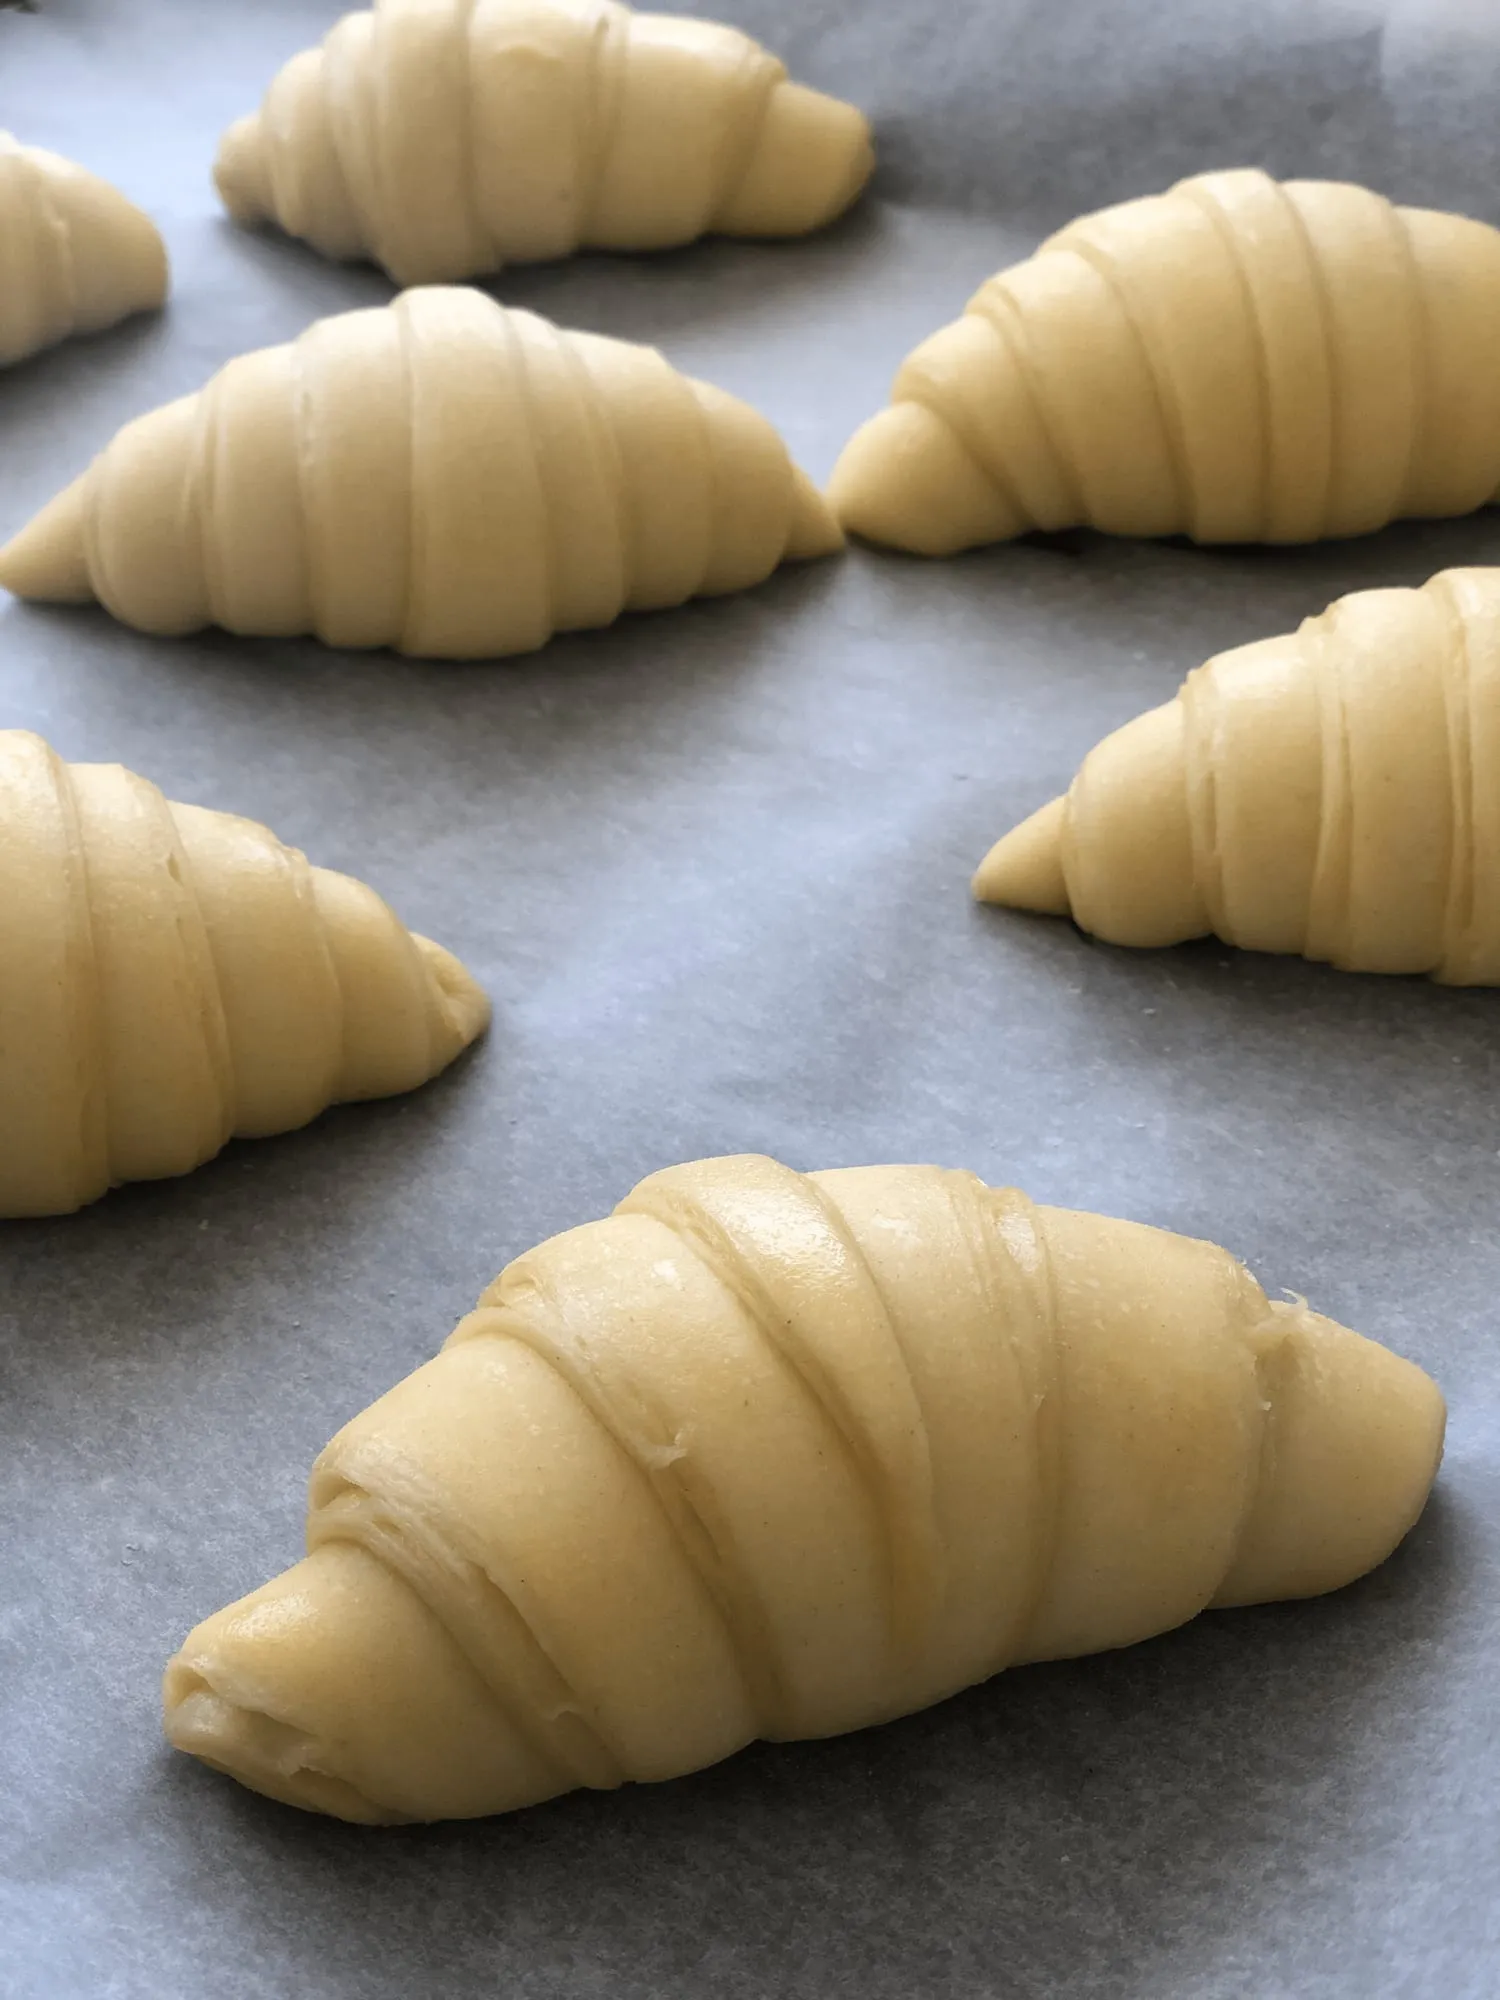 Sourdough Croissants after 16.5 hours of proofing
The result was eatable even though the croissants had some acidity. We ate them quickly without any hesitations 😉
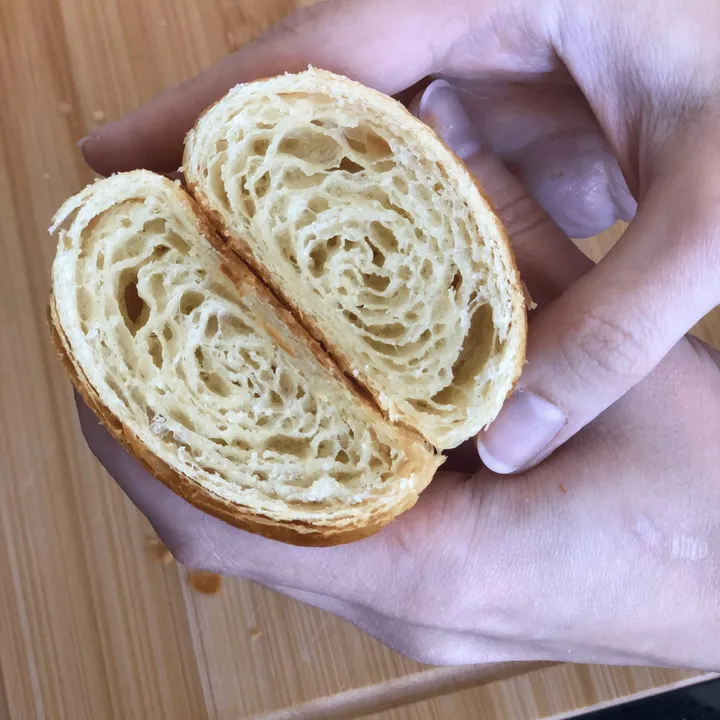
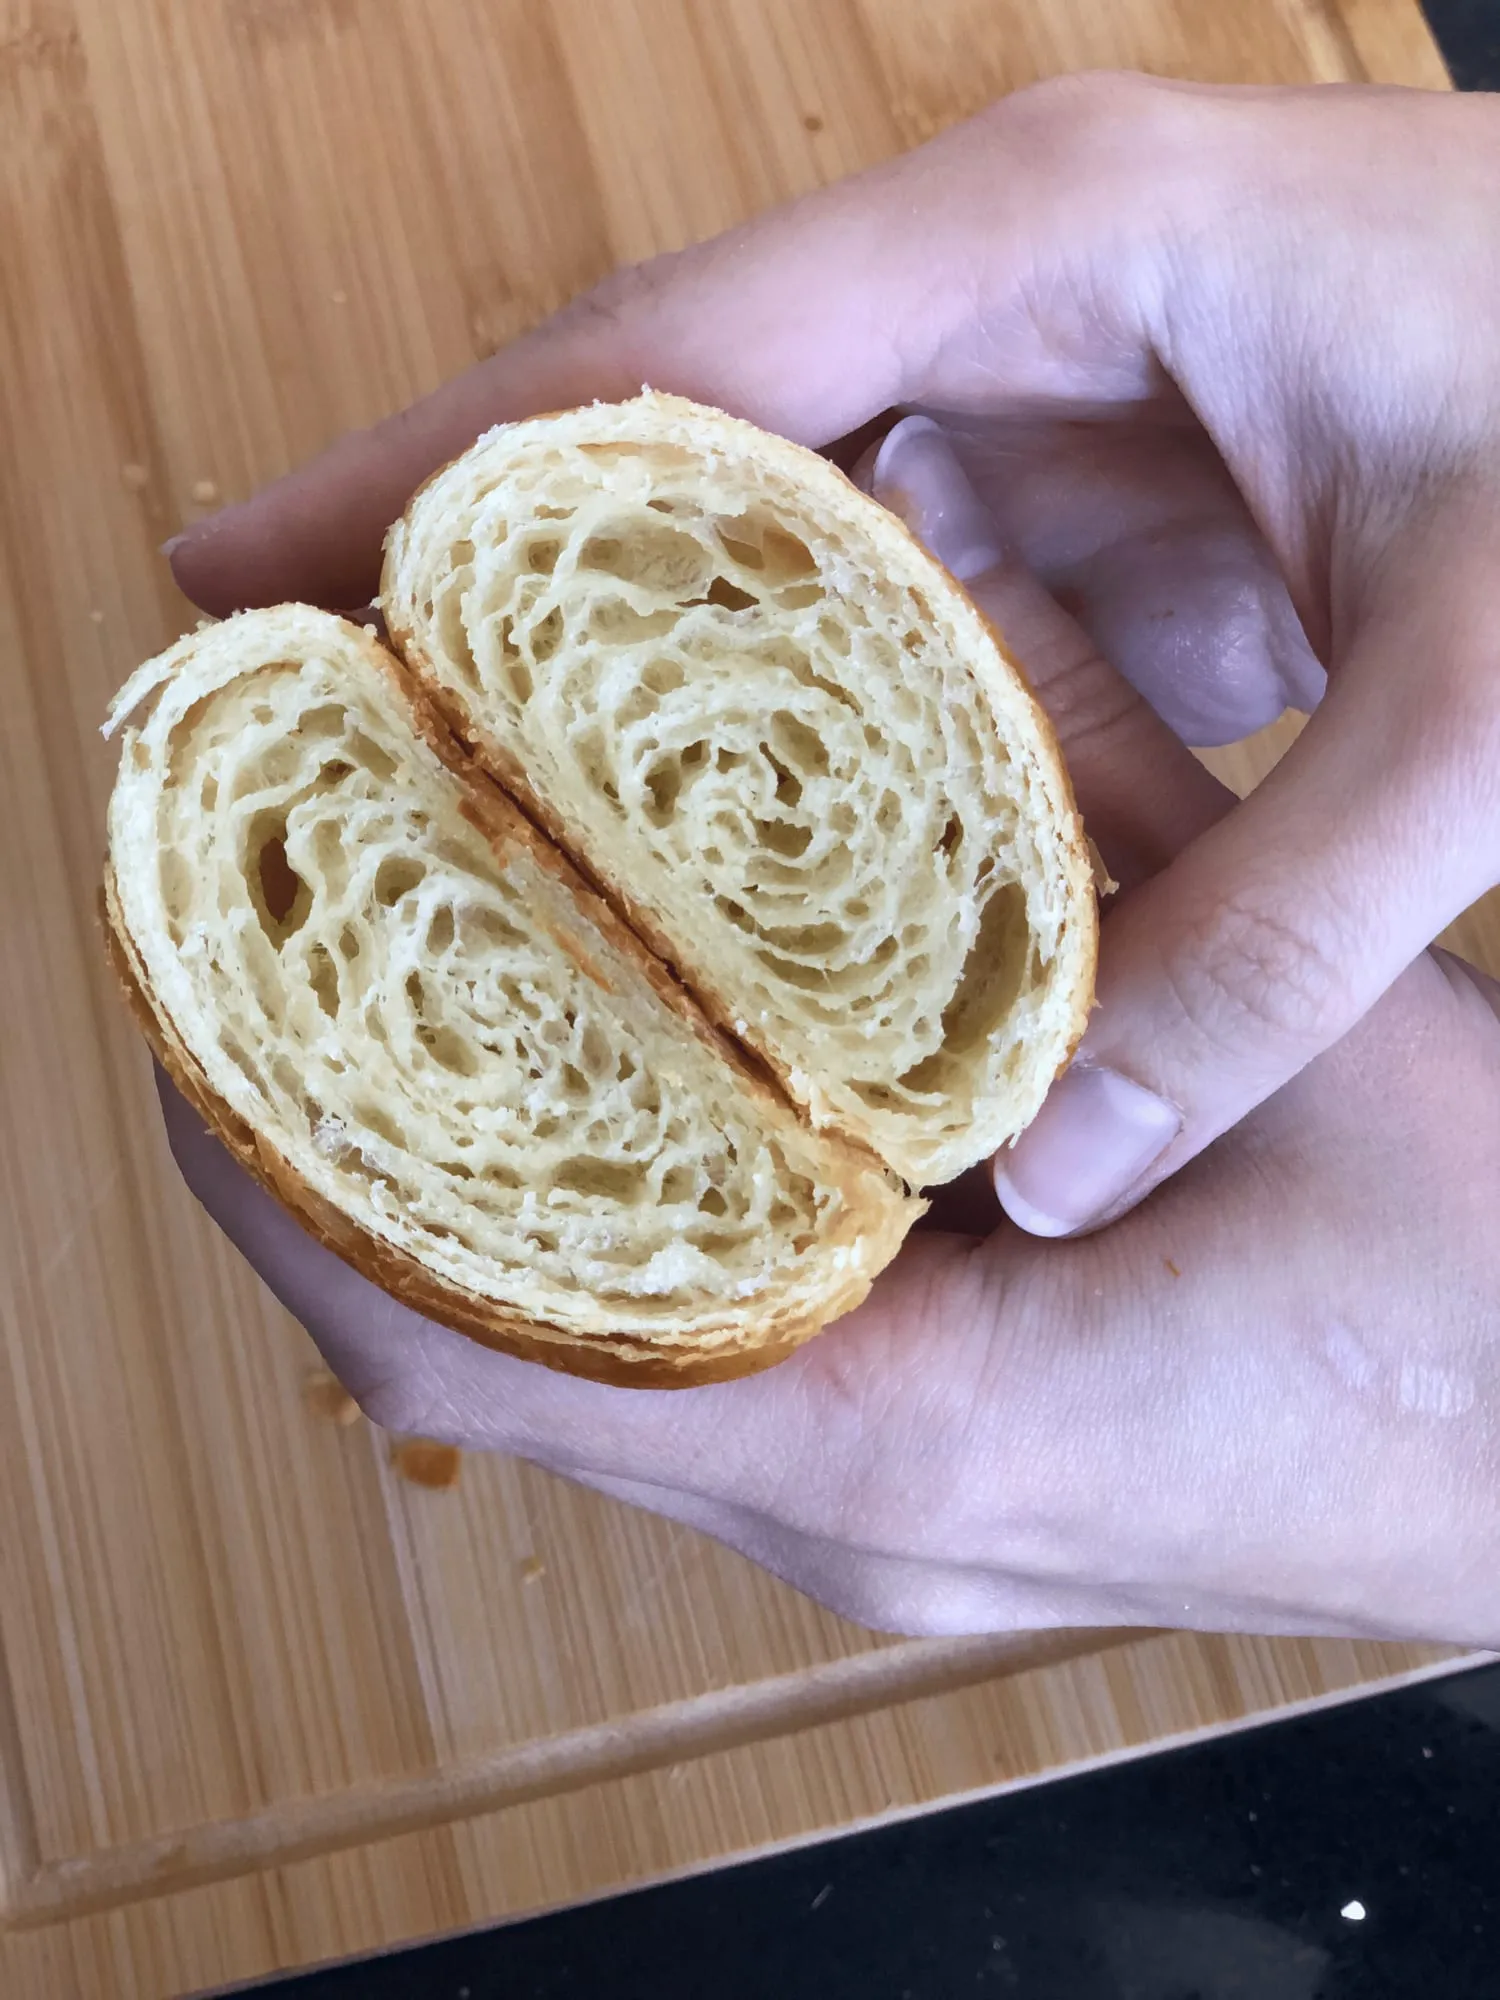 Sourdough Croissant Crumb
Conclusions:
To eat your homemade sourdough croissants, you need to take risks.
It’s a win-win.
You’ll gain the experience, or you’ll gain the experience 🏆 and eat croissants 🏆🥐
 Sourdough Croissant Crumb
Recipe:
Thanks, _flour_water_salt for this 100% Sourdough Croissants recipe. It includes a liquid starter (with 100% hydration), but I used a stiff starter for this batch of croissants.\
Recipe
Sourdough Croissants
Equipment
- mixing bowl
- kitchen scales
- reusable bowl cower
- dough scraper
- roller pin
- plastic wrap (clingfilm)
- parchment paper
Ingredients
Butter for lamination
Instructions
Day 1
Prepare a leaven. Mix flour, water and leaven in proportion 1:1:1 and let it rise for 5-6 hours at 24-26℃.
When the leaven is ready, mix all the ingredients in a bowl.
Knead the dough 5 mins until a smooth ball is formed.
Proof the dough covered at temperature 26° C, 1-2h.
Then, put the dough covered into the fridge overnight.
Day 2
Fold a parchment paper in half and measure a rectangle, sized 15x20 cm.
Cut the butter for lamination (130g) into a rectangle 15x20 cm. Roll out the butter to have the same thickness and cool down in the fridge for at least 1 hour.
First Set of Lamination:
Take the dough out of the fridge and roll it into a rectangle sized 15x30 cm.
Take the butter out of the fridge and give it 5 mins to warm up a little bit. Place the butter over ⅔ dough and lock the butter in. Roll out the dough and do a double fold (book fold).
Cool down and relax the dough for 15 mins [timer minutes=0][/timer] in the fridge.
Second Set of Lamination:
Take the dough from the fridge. Roll out to 25x50cm. Do a single fold (letter fold). Rest 1-2hr in the fridge.
Roll out 25x60cm. Cut into triangles of 10x25cm, roll into croissants.
The final proof overnight, t 26-28°C. The Croissants should be cloudy and jiggle when you shake the tray.
Day 3
Egg wash the croissants before baking. For the eggwash I use 1 quail egg and a table spoon of milk.
Bake at 180°C for 25 mins [timer minutes=0][/timer] using the Convection type of cooking.
Remove your hand-laminated, 100% sourdough croissants from the oven. Let them cool down a little bit while you're making a cup of coffee.
Enjoy this moment of pleasure!
Keywords: Croissants

Comments
No comments yet. Be the first to share your bake!
Comments could not be loaded right now.